

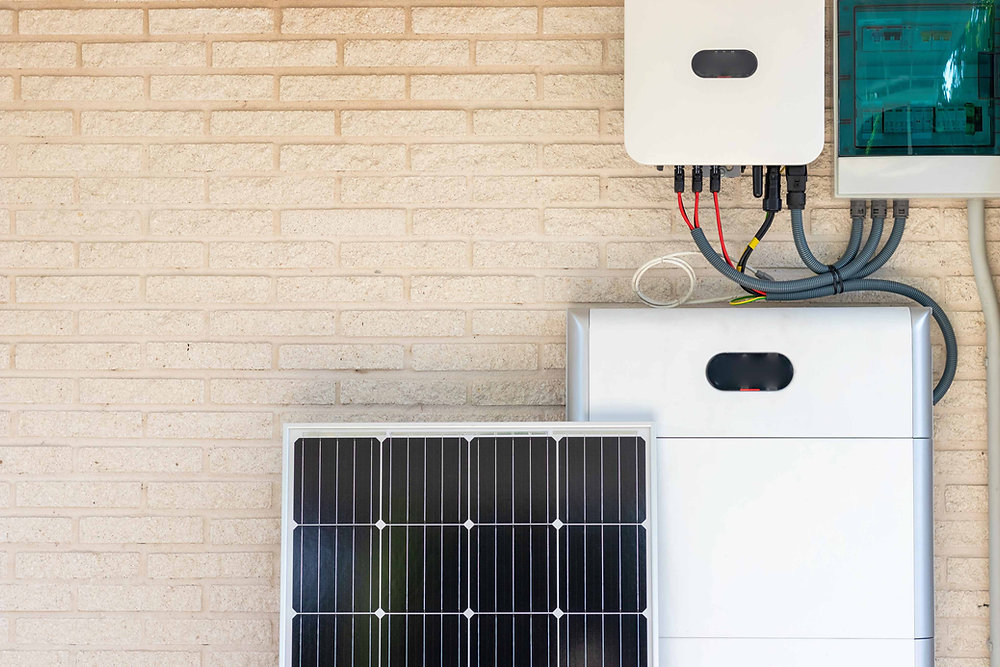
A DIY solar battery bank stores energy from solar panels for off-grid loads or outage backup. A successful build depends on getting the battery chemistry, voltage, usable capacity, BMS, inverter, charge controller, conductors, and protection right before wiring anything together.
This guide explains how to build and size a battery bank, including a built-in sizing calculator, how series and parallel connections affect voltage and capacity, and when a DIY system crosses into a permitted residential energy storage project. It also covers battery chemistry, wiring, safety codes, and troubleshooting, whether you’re aiming for a small off grid battery bank or a DIY home battery for storm backup.
Not every project looks the same. Some people want a small off grid battery bank for a cabin, boat, or remote workshop. Others are after a DIY home battery that can back up part of the house during a storm. We’ll walk through both paths, plus what changes once a battery bank gets permanently wired into your home’s electrical system.
Thinking about connecting your finished battery bank to your home’s wiring down the road? It helps to understand the permitting side early, since it shapes how the whole system gets designed. Solar permit design is one of the services GreenLancer’s engineers handle directly for solar and storage projects nationwide.
⚠️ Safety note: Building a battery bank involves real electrical, chemical, and fire risks, and requirements vary by location, chemistry, and how the system connects to your home. This guide is for general education only, so follow the manufacturer’s instructions for every component, confirm requirements with your local authority having jurisdiction, and consult a licensed electrician for any work involving household wiring.
How to Build a DIY Battery Bank: Quick Overview
Before getting into specifics, here’s the short version of how to build a battery bank. Each step gets its own section later in this guide, so treat this as a map of what’s ahead. The Department of Energy’s solar integration and storage basics overview is a good starting point if you want the fundamentals of why pairing storage with solar makes sense in the first place.
-
Pick your battery chemistry and system voltage.
-
Size the bank around your daily energy use.
-
Gather batteries, BMS, charge controller, inverter, conductors, overcurrent protection, disconnects, and an appropriate enclosure.
-
Wire the batteries together and connect the charging and inverter equipment.
-
Test the system under load, then commission it.
What You Need to Build a Solar Battery Bank
A DIY solar battery bank has seven main parts. Skip or undersize any one of them and you’ll usually feel it later, whether that’s a BMS that can’t keep up or an inverter that trips under a real load. Here’s what each component does.
-
Batteries. The storage core of the system. Lead-acid, AGM, and lithium iron phosphate (LiFePO4) are the most common choices for a DIY battery bank.
-
Battery Management System (BMS). Monitors and protects the battery based on parameters like cell voltage, current, and temperature, and may provide state-of-charge monitoring depending on the system. It’s what keeps a lithium bank from overcharging or over-discharging.
-
Charge Controller. Regulates the power coming from your solar panels so the batteries charge safely instead of getting overcharged.
-
Inverter. Converts the stored DC power into AC power your household appliances can actually use. Size it to the total wattage of what you plan to run.
-
Cables and Connectors. Rated for the current your system will carry, with insulated, corrosion-resistant connections at every joint.
-
Overcurrent Protection and Disconnects. Properly rated fuses or circuit breakers protect conductors and equipment from excessive current, while disconnecting means let you safely isolate the battery and related equipment for service.
-
Enclosure or Housing. Protects the bank from moisture, dust, and temperature swings, and helps with ventilation.
DIY Battery Bank Kit vs Individual Components
A prebuilt DIY battery bank kit bundles the battery, BMS, and sometimes the inverter into one package with matched specs. Building from individual components takes more research, but it gives you more control over chemistry, voltage, and capacity. Kits usually cost more per amp-hour, though they save time and cut down on compatibility mistakes for a first build.
How to Build a DIY Solar Battery Bank Step by Step
Once you have your components, building a battery bank for solar comes down to five stages. Each one matters, and skipping ahead is where most DIY mistakes happen. Work through them in order.
Step 1: Determine System Voltage and Capacity
Start with your target system voltage, usually 12V, 24V, or 48V, based on your inverter and expected loads. Then calculate your usable capacity in amp-hours or kilowatt-hours, since manufacturers list batteries in one unit or the other and you’ll need to convert between them.
A 10 kWh bank at 48V works out to roughly 208 Ah (10,000 Wh ÷ 48V), before accounting for reserve capacity, losses, or manufacturer limits. This number drives every decision that follows, including how many batteries you’ll wire together and how large your charge controller and inverter need to be.
Step 2: Configure Batteries in Series, Parallel, or Series-Parallel
Wiring batteries in series adds their voltages together while keeping amp-hour capacity the same. Wiring them in parallel keeps voltage the same but adds their capacity together. As an example, four 12V, 100Ah batteries wired in series produce a nominal 48V, 100Ah bank, while two identical 48V, 100Ah strings wired in parallel would produce 48V, 200Ah. Most home battery banks use a series-parallel configuration to hit both a target voltage and a target capacity, and it’s worth double-checking your BMS supports whatever configuration you land on.
Step 3: Install and Configure the BMS
Wire the BMS according to the manufacturer’s instructions, matching it to your battery chemistry, cell count, and voltage. Just as important, confirm its continuous and surge current ratings actually support your inverter’s load, since an undersized BMS is one of the most common DIY mistakes. Get this step wrong and you risk shortening the life of the entire bank or tripping protection at the worst possible time, so don’t rush the wiring here.
Step 4: Connect Charging and Inverter Equipment
Connect your charge controller between the solar array and the battery bank, then wire the inverter to the battery output. Size the charge controller to handle your array’s maximum PV input current while staying within your battery’s maximum charging current, since undersizing either one can trip protection or leave power on the table.
Provide overcurrent protection and disconnecting means where required by the equipment instructions and applicable electrical requirements, and size conductors and protection for the expected current. Double check polarity before you power anything on, since a reversed connection can damage the BMS, the charge controller, or the inverter in seconds.
Step 5: Test and Commission the Battery Bank
Bring the system up under a light load first, then gradually increase it toward the bank’s rated capacity. Watch voltage, current, and temperature at each stage. This is also the point to confirm your BMS alarms and disconnects actually trip when they’re supposed to, before you rely on the system for real backup power.
How to Size an Off-Grid Battery Bank
To size an off-grid battery bank, calculate your average daily energy use, multiply it by the number of days of autonomy you need, and divide by the usable depth of discharge of the battery. That gives you a starting estimate, not a final design number. Undersize it and you’ll run out of power on a cloudy day, while oversizing means paying for capacity you’ll rarely use.
For illustration, say you use 5 kWh per day and want two days of autonomy, and assume the LiFePO4 manufacturer allows 90% depth of discharge. That works out to roughly 11.1 kWh of battery capacity (5 x 2 ÷ 0.9).
The same scenario with a lead-acid design using a 50% depth-of-discharge target would need roughly 20 kWh instead, since you can only use about half of what’s stored. From there, adjust for inverter and wiring losses, battery temperature, expected solar recharge, and a reserve margin, since the manufacturer’s actual specifications for your battery should always be the final word. AltE Store’s off-grid sizing calculator is a useful way to double-check your own numbers.
Off-Grid Battery Bank Sizing Checklist:
-
Daily energy use, in watt-hours or kilowatt-hours
-
Days of autonomy you want during cloudy stretches
-
Depth of discharge your specific battery’s manufacturer allows
-
System voltage, matched to your inverter and charge controller
-
Inverter surge rating, for appliances with startup loads like pumps or compressors
-
Expected solar recharge, especially during low-sun winter months
-
Inverter and wiring losses, plus a reserve capacity margin
Battery Capacity vs Battery Power
Capacity and power answer two different questions. Capacity, measured in kWh, tells you how long a load can run. Power, measured in kW, tells you how much you can run at once. A 10 kWh battery bank doesn’t automatically mean it can start a well pump or an air conditioner compressor, since that depends on the inverter’s surge rating and the battery’s discharge limits too.
Battery Discharge Current and C-Rate
A battery bank needs enough stored energy for the desired runtime, but it also has to supply enough current for the inverter load at any given moment. Battery manufacturers specify maximum continuous and peak discharge current, sometimes expressed as a C-rate relative to the battery’s capacity. The battery, BMS, conductors, overcurrent protection, and inverter all need compatible current ratings, or you’ll trip protection well before you run out of stored energy.
Backup Power vs Off-Grid Autonomy
A backup system is usually sized around selected critical loads and a target outage duration, whether that’s a few hours or several days. An off-grid battery bank has to support ongoing daily loads while also accounting for periods when solar production is too low to fully recharge the bank. That can make an off-grid battery bank substantially larger than a backup-only system serving the same instantaneous loads.
Should You Build a 12V, 24V, or 48V Battery Bank?
Higher system voltage means lower current for the same amount of power, which can allow for smaller conductors and lower electrical losses.
-
12V battery bank: A 2,400-watt load draws about 200 amps before accounting for losses.
-
48V battery bank: The same 2,400-watt load draws about 50 amps.
That lower current is one reason 48V battery banks are common in larger off-grid systems. Smaller systems, such as a shed or RV setup, may use 12V for simplicity, but conductor size increases as current rises.
Every component in the system still needs to be rated for the final voltage and current.
Choosing a DIY Battery Bank Chemistry
LiFePO4 generally offers longer cycle life, deeper usable capacity, and lower routine maintenance than lead-acid, while lead-acid typically costs less upfront. Chemistry affects cost, lifespan, safety, and how much of the rated capacity you can actually use. Battery University’s guide to charging LiFePO4 is a solid technical reference if you want to go deeper on any of these chemistries. Here’s how the common options stack up for a DIY project.
|
Typical Design Consideration |
||||
|
Solar and off-grid storage |
Often several thousand cycles; follow manufacturer specifications |
Often supports deeper cycling; follow manufacturer limits |
Needs a compatible BMS, charge settings, and temperature limits |
|
|
Varies widely with battery design and depth of discharge |
Shallower cycling generally extends service life |
Ventilation and regular maintenance |
||
|
Varies widely by design and depth of discharge |
Depth-of-discharge limits vary by manufacturer and design |
Weight and sensitivity to overcharging |
||
|
Automotive Starting Battery |
Poor under repeated deep cycling |
Not designed for deep discharge |
A DIY lithium battery bank built around LiFePO4 is a popular choice for solar work because it generally offers long cycle life, high usable capacity, and greater thermal stability than several other lithium-ion chemistries. That doesn’t mean it’s low-maintenance in every sense, since it still needs compatible charge settings, BMS protection, and operation within the manufacturer’s temperature limits, including restrictions on charging at low temperatures.
The National Laboratory of the Rockies, formerly NREL, continues to study battery safety and failure modes across chemistries, and their work is a good reference if you want the research behind these recommendations.
Can You Build a Battery Bank With Car Batteries?
A homemade battery bank with car batteries is technically possible, but it’s usually not a good idea. Automotive starting batteries are built to deliver a short, high burst of current for cranking an engine, not to discharge slowly and repeatedly over hours.
Repeated deep cycling can shorten the service life of automotive starting batteries substantially compared with batteries designed for deep-cycle storage, which ends up costing more in replacements than buying the right battery from the start.
Can You Build a DIY Battery Bank for Your Home?
Yes, you can build a DIY battery bank for home backup or off-grid loads, but permanently connecting a custom battery bank to household wiring is a different type of project, with additional equipment, code, permitting, and inspection requirements.
That distinction generally breaks down into three fairly different projects. A standalone off-grid bank powers a separate structure or system with no tie to your house wiring at all, a dedicated-load setup powers specific circuits like a few outlets or a refrigerator without touching the main panel, and a permanently interconnected home ESS ties into your electrical system and, in many cases, your solar array and utility connection too.
-
Standalone off-grid bank: most flexible for a DIY build, no utility interconnection required
-
Dedicated-load setup: moderate complexity, still generally isolated from main household wiring
-
Permanently interconnected home ESS: the most regulated option, and usually where professional design and permitting come in
Where a battery bank lands on that spectrum affects what rules apply. NYSERDA’s overview of home energy storage notes that placement decisions for a battery system often come down to local permitting rules, not just where it happens to fit in the garage. If you’re retrofitting a bank onto a system you already have, our guide to adding a battery to an existing solar system walks through sizing and integration for that specific scenario.
How to Connect Solar Panels to a Battery Bank
Knowing how to connect a solar panel to a battery bank starts with understanding the basic power flow, then how individual batteries link together. Our solar energy diagram guide covers the difference between a conceptual diagram like the ones below and an actual permit-ready wiring diagram, which is worth understanding before you assume a sketch from a blog post is enough for an inspector.
Series vs Parallel Battery Connections
Series wiring increases battery-bank voltage, while parallel wiring increases amp-hour capacity at the same nominal voltage. The diagrams below use four nominal 12V, 100Ah batteries in each configuration so the totals are easy to compare.
Example uses four nominal 12V, 100Ah batteries. Actual battery count, capacity, protection, and allowable configurations depend on the equipment and manufacturer requirements.
Series connections run from the positive terminal of one battery to the negative terminal of the next, and parallel connections tie all the positive terminals together and all the negative terminals together. A series-parallel setup combines both, and it’s the most common approach for a multi-battery home bank.
One rule matters more than the wiring pattern itself: don’t mix batteries with different chemistries, nominal voltages, capacities, ages, or states of charge in the same bank unless the manufacturer explicitly supports that configuration. Mismatched batteries wear unevenly, and that mismatch tends to get worse over time rather than better.
Basic Solar Battery Bank Power Flow
At a conceptual level, power moves from the PV modules to the charge controller, into the battery bank, out to the inverter, and finally to your AC loads. This diagram shows a conventional DC-coupled architecture specifically, since AC-coupled storage systems route power differently.
DIY Battery Bank Safety, Equipment Listings, and Code Requirements
Code, listing, permitting, and inspection requirements become especially important once a battery bank is permanently installed, connected to household wiring, paired with rooftop solar, or interconnected with the utility. A battery bank running equipment in a shed, RV, or isolated off-grid setup isn’t necessarily regulated the same way. Either way, a few safety basics apply across the board.
What a Homemade Battery Bank Should Have:
-
Ventilation and thermal management appropriate for the battery chemistry, enclosure, and manufacturer requirements
-
A BMS or other protective device matched to the chemistry
-
Insulated, corrosion-resistant connections at every joint
-
Secure mounting that prevents vibration or movement
-
A clear disconnect point for maintenance and emergencies
-
Temperature monitoring, especially for lithium chemistries
NEC Article 706 and Energy Storage Systems
The National Electrical Code covers electrical requirements for permanently installed energy storage systems in Article 706, including disconnecting means, overcurrent protection, circuit requirements, and other safety provisions. Exact requirements depend on the NEC edition adopted by your local jurisdiction, the system configuration, and the equipment being installed. Confirm the applicable requirements with your local authority having jurisdiction before finalizing a design.
NFPA 855 and Placement Requirements
NFPA 855 addresses the installation and fire safety of stationary energy storage systems, including where residential ESS equipment may be installed, allowable energy capacity, separation, and protection requirements. Requirements differ by installation location, system capacity, technology, adopted edition, and authority having jurisdiction. Confirm the locally adopted requirements before choosing a location for your battery bank.
UL 9540 and Why a DIY Bank Isn’t Automatically a Listed System
This is probably the single most important nuance in this whole section. UL 9540 is a system-level certification, meaning the battery, inverter, and controls are tested together as one unit, not evaluated individually.
Using individually listed batteries, an inverter, a BMS, and protective devices doesn’t automatically make your assembled battery bank a UL 9540-certified energy storage system, and UL Solutions explains this distinction in more detail. Permanently installed residential ESS projects can be subject to equipment listing, fire code, electrical code, and manufacturer requirements that a fully custom assembly simply can’t satisfy on its own.
Is Lithium Battery Storage Actually Safe?
Lithium battery fires get a lot of attention, and it’s worth understanding the real numbers before assuming the worst. Clean Energy Group’s residential fire safety FAQ documents a relatively small number of US residential battery fires and explosions over more than a decade, with no reported deaths since 1995 across all battery storage sectors. That said, those numbers describe a large, mostly professionally installed population and shouldn’t be read as personal odds for a custom-built project.
Failures can involve thermal runaway, fire, flammable gases, and difficult emergency response conditions, so proper equipment selection, installation quality, battery management, thermal protection, and manufacturer requirements all remain critical.
Installing and Maintaining Your Battery Bank
Place your battery bank somewhere ventilated, out of direct sunlight, and protected from temperature swings. Extreme heat and cold both shorten battery life, and repeated freeze-thaw cycles can be especially hard on lead-acid chemistries. Once it’s installed, a simple maintenance routine keeps it running reliably for years.
-
Check terminal connections periodically for corrosion or looseness
-
Monitor state of charge and watch for unusual voltage drift
-
Keep the enclosure clean and the ventilation path clear
-
Log any error codes from the BMS or inverter as they happen
-
For flooded lead-acid batteries, follow the manufacturer’s procedures for electrolyte inspection and topping off
-
For lithium systems, investigate persistent cell-voltage imbalance, temperature warnings, or repeated BMS protection events rather than repeatedly resetting the system
Troubleshooting Common Battery Bank Problems
Even a well-built DIY battery bank runs into occasional issues. Stop using the bank and follow the manufacturer’s safety procedures if you notice swelling, excessive heat, smoke, an unusual odor, electrolyte leakage, damaged conductors, or repeated protection trips. Here are the issues that come up most often under normal operation.
-
Overcharging: check that the charge controller is functioning and set to the correct voltage range for your battery chemistry.
-
Undercharging: look for a loose connection, an incorrect charge controller setting, or insufficient sunlight reaching the array.
-
Battery imbalance: monitor individual cells or modules and rebalance if voltages start drifting apart.
-
Inverter malfunctions: check for loose connections or blown fuses before assuming the inverter itself has failed.
-
Charge controller issues: inspect wiring and settings, and watch for error codes that point to the actual fault.
DIY Battery Bank vs a Home Energy Storage System
At some point, most people ask whether they should keep building it themselves or switch to a listed, professionally installed system. There’s no universal right answer, but the table below lays out the practical differences.
|
Permanently Installed Home ESS |
|
|
Often standalone or off-grid |
Integrated with household wiring |
|
Custom components and chemistry choices |
Usually a listed, matched system |
|
May power dedicated loads only |
Can support broader household circuits |
|
Design and wiring depend on the builder |
Electrical, fire, and building code review applies |
|
Utility approval may not be required |
Interconnection approval often required when grid-tied |
Our solar plus storage guide breaks down how AC-coupled and DC-coupled systems differ, useful if you’re retrofitting a DIY bank alongside existing solar, and EnergySage’s guide to home batteries is worth a look if you’re still weighing DIY against a listed, professionally installed system. If your project is headed toward interconnection, our solar battery storage permit guide covers the ESS-specific permit documents, clearance requirements, and fire review steps you’ll likely run into.
GreenLancer offers solar design and engineering services for DIY solar installers and contractors alike. Our team prepares permit-ready plan sets, engineering reviews, and interconnection documentation so your solar and storage project has the technical documents needed for permitting and inspection. Complete the form below to get started with GreenLancer’s solar and storage services.
Complete the form below to learn more.
DIY Solar Battery Bank FAQ
What Is a DIY Solar Battery Bank?
A DIY solar battery bank is a set of batteries wired together, along with a BMS, charge controller, and inverter, to store solar power for later use. It can be as small as a single 12V battery for a shed or as large as a whole-home backup system, depending on how it’s sized and configured.
How Do You Size a Battery Bank for Off-Grid Solar?
Multiply your daily energy use by your desired days of autonomy, then divide by your battery’s allowable depth of discharge. Off-grid systems generally need more capacity than backup-only systems, since there’s no grid to fall back on during a stretch of cloudy days. Use the calculator above to run your own numbers.
Is LiFePO4 or Lead-Acid Better for a DIY Battery Bank?
LiFePO4 typically offers a longer cycle life, higher usable depth of discharge, and less maintenance than lead-acid. Lead-acid usually costs less upfront and remains a workable choice for smaller, budget-conscious builds where cycle life matters less.
Can You Build a Battery Bank With Car Batteries?
Technically yes, but it’s not recommended. Automotive starting batteries are built for short, high-current bursts rather than repeated deep discharge, so they tend to wear out quickly in a solar storage application compared with a true deep-cycle battery.
Should a DIY Battery Bank Be 12V, 24V, or 48V?
Higher voltage systems generally run lower current for the same power output, which can mean potentially smaller conductors and fewer losses. 48V is common for larger off-grid systems for this reason, while smaller setups like a shed or RV bank often stay at 12V for simplicity.
Can You Connect a DIY Battery Bank to Your Home’s Electrical System?
Yes, but that shifts the project from a standalone build into a permanently interconnected energy storage system. That generally brings in electrical code, fire code, equipment listing, and often utility interconnection requirements that a fully custom battery bank may not meet on its own.
Do You Need a Permit for a DIY Solar Battery Bank?
Permit requirements depend on where and how the battery bank is installed. A portable or self-contained setup may be treated differently from a permanently installed one, but once a battery bank connects to premises wiring, your home’s electrical system, rooftop solar, or the utility grid, electrical permits and other approvals are commonly required. Check with your local authority having jurisdiction before installation.
How Big a Battery Bank Do I Need to Back Up My Home?
That depends entirely on which loads you want to keep running and for how long. A setup covering just the refrigerator, some lighting, and a Wi-Fi router needs far less capacity than one covering HVAC and well pump equipment during an extended outage.
How Long Does a DIY Battery Bank Last?
Battery bank lifespan depends on chemistry, cycle frequency, depth of discharge, temperature, charge settings, and equipment quality. LiFePO4 batteries commonly support substantially more charge and discharge cycles than many lead-acid designs, but always check the manufacturer’s cycle-life specifications for the actual battery you’re considering rather than relying on a general rule of thumb.
Source link